
 This tutorial is designed to be a step by step guide to making fusible binding for your projects. A fusible binding is perfect for display pieces that will not receive the wear and tear bed quilts do. It's perfect for wallhangings in specific and lots of other small things I haven't considered. It's easy and fast to make as well! I used fusible binding in making a soft backed children's book as well. The patterns are for sale here.
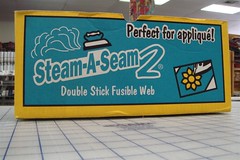
Step 1- Selecting your fusible
There are many fusible interfacings available that are double sided. The most common are Steam-A-Seam-2, wonder under, and thermobond. I like Steam-A-Seam-2 better than the other types available (for this project) because there are two sheets of paper and the fusible in the middle is sticky so it doesn't shift while you're trying to work with it.
 Step 2- Cutting the Interfacing and Fabric
You should cut strips of the fusible interfacing a bit wider than you intend for the the binding itself to be (so you have room to trim if you need).
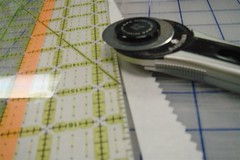
I cut all of my strips with a rotary cutter. As a side note, I keep one marked specifically for cutting paper and non fabric materials. Older blades that won't cut fabric will still cut paper just fine.
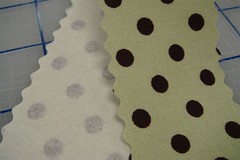
I cut both my fabric and interfacing strips 2.5 inches wide. The strips shown in the photos are short for example's sake. You'd cut your strips the length of the item you're looking to bind.
 Step 3- Getting Ready
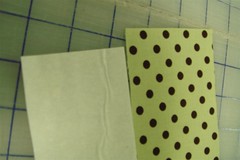
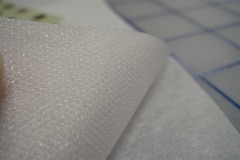
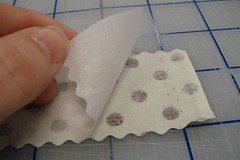
Steam-A-Seam-2 is unique because the fusible interfacing itself is sticky and is enveloped in paper on both sides. When you start this step you need to peel back one of the sheets of paper, and off the interfacing. You should be left with a piece of paper that is tacky to the touch (this is the interfacing) and stick it to the wrong side of your fabric. If you look at the photo to the left, the interfacing has a honeycombed texture, while the paper alone has a similar texture to freezer paper.
The photo on the right shows the interfacing temporarily attached to the wrong side of the fabric, ready to be ironed.

Step 4- Ironing (aka don't burn yourself)
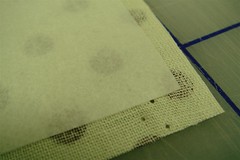
Once you have the Steam-A-Seam-2 lined up, iron it to the fabric. Remember, you are ironing paper, so use a medium heat and keep the iron moving. Turn off the steam! The paper becomes almost translucent after being heated to attach the interfacing.
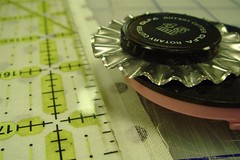
 Step 5- Decorative Trim
So in reality, the piece of fabric you have in your hands could be used as a fused binding, but it's really not that exciting. I've also found that sometimes a straight grain fusible binding can fray and make a mess over time with a little bit of wear.
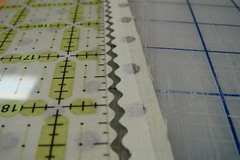
I use a wavy edged rotary cutter to give the piece a decorative edge. I trim one side, and then place the ruler line at the two inch mark in the middle of the waves for my second trim.
 Step 6- You're ready to bind!
So now you have a two inch wide strip of decorative fusible binding ready to attach to your project!
The paper back peels off, leaving a sticky binding that's easy to position before ironing it down! I normally also try to stitch it down after ironing as well... it gives a more traditional look and a bit more polish.

All Done!
The photo on the right is of a children's book I made that uses these same instructions to bind soft pages with Fast2Fuse or Timtex. The photo is of the corner of the book, and shows a red fusible binding stitched down with black thread for contrast.
You can also find a version of this tutorial at the instructables site or included in my pattern for a soft children's book found here on etsy. The fabric used in the demo is from the Michael Miller Kid's Toile Line.


This is great info, thanks for posting!
Thank you for taking the time to make this tutorial (got here from Instructables). It occurs to me that it'd make a fine fabric tape too.